How do I filter jobs based on barangays?
Cluster Management

This module is a guide on how to create a Cluster so Users could organize and filter job posts based on their Barangays.

Module Note: You can now download an offline version (no images) for this article. Just click the PDF file below to download.
Create a Cluster
To Create a New Cluster:
1. Click Settings.
2. Click Cluster Management.
3. Click Add New Cluster.
4. Fill-out the necessary details:
a. Hub
b. Cluster Code
c. Cluster Name
d. Province
e. City
f. Barangay - A Barangay can only be selected ONCE. Barangays already in a Cluster can no longer be selected for a new cluster.
g. Drivers - Multiple drivers can be assigned to a cluster.
5. Click Save.
Update a Cluster
To Edit an Existing Cluster:
1. Click the Pencil icon under the Actions column.
2. Make the necessary changes.
3. Click Save.
Remove a Cluster
To Delete an Existing Cluster:
1. Click the Trash icon under the Actions column.
2. Click Confirm.
Testing the Cluster
To Test a Recently Created Cluster:
1. Click Filters on the Pending Jobs Page.
2. Under the Cluster filter, select the recently created cluster. Jobs with locations under the selected cluster will appear.
 Note: Click Reset to remove the cluster filter and view all the jobs in the Pending Jobs page.
Check Cluster's Assigned Drivers
To Check the Cluster's Assigned Drivers:
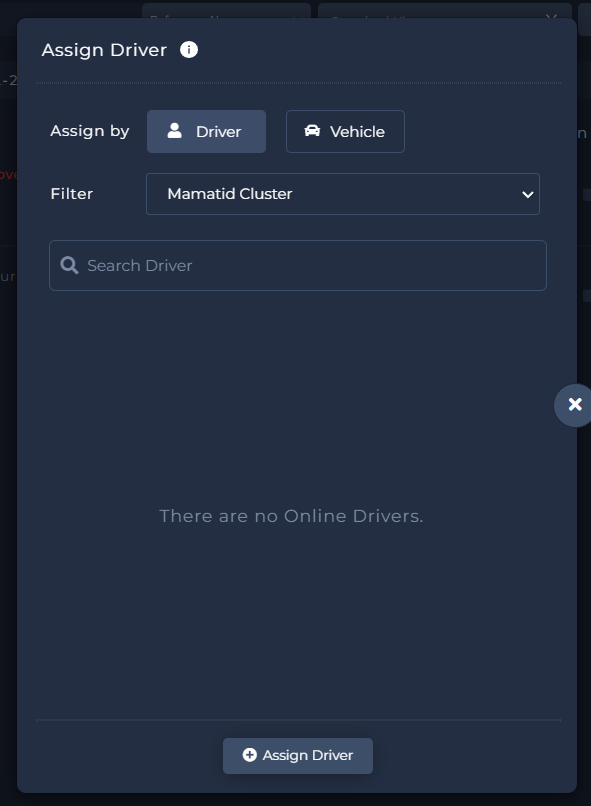
1. Click the Assign Driver button of a job post under the selected cluster.

Note: Job posts will only appear in your selected Cluster if the "Barangay" field is filled-out in the Add New Job (Step 1).
2. Choose the recently created cluster in the Cluster filter.
Note: For Regular Jobs, ONLY Online Drivers will appear. A tooltip info (Assign Driver modal) will also include this modal.
Assign Driver (Regular Jobs)
Note: For Advance and Recurring Jobs, ALL drivers will appear even if Offline. A tooltip info (Assign Driver modal) will also include this modal.
Assign Driver (Advance/Recurring Jobs)

For more information, click here to view the Cluster Management Video Manual, or play the video below:
Related Articles
How do I manage users on my Fleet Web Account?
User Management This module is a guide on creating and managing Users who will have access to Fleet Web jobs and other data. Module Note: You can now download an offline version (no images) for this article. Just click the PDF file below to download. ...What can I see in my Fleet web account page upon logging in?
Homepage View: List View This module is a guide for the List View or the Default view upon logging in to a Fleet Web account. Users can also view job posts or view the job post's details. Sample view of job posts in List View Different action buttons ...What actions can I do for multiple selected jobs?
Multiple Action Buttons This module is a guide on what actions can be applied on multiple selected jobs in the Pending Jobs Page (e.g., plot routes, add tags, assign a driver, transfer jobs, or cancel multiple jobs). View "Multiple Action" Buttons To ...How can I view the number of jobs that I have within an area?
Homepage Views: Cluster View This module is a guide on how Fleet Web users can view the number of jobs within an area. Access Cluster View Click the Map icon on your Pending Jobs page, to access the Cluster View. View Area's Jobs You can zoom in on ...How do I customize my Fleet Web profile?
App Settings This module is a guide for App Settings where Fleet PH Users can customize their web profile. They can customize the following: a. Profile Logo b. The Color Theme of the Tracking URL c. Image Resolution for PODs to save data usage d. ...