How do I create a custom view to only display specific job details?
Custom View

This module is a guide on how to create a Custom View so that Web users can customize the which job columns/details will appear in their Pending Jobs page.
Create a Custom View
To Create a New Custom View:
1. In the Pending Jobs page, click the Custom View filter.
2. Click Add New Custom View.
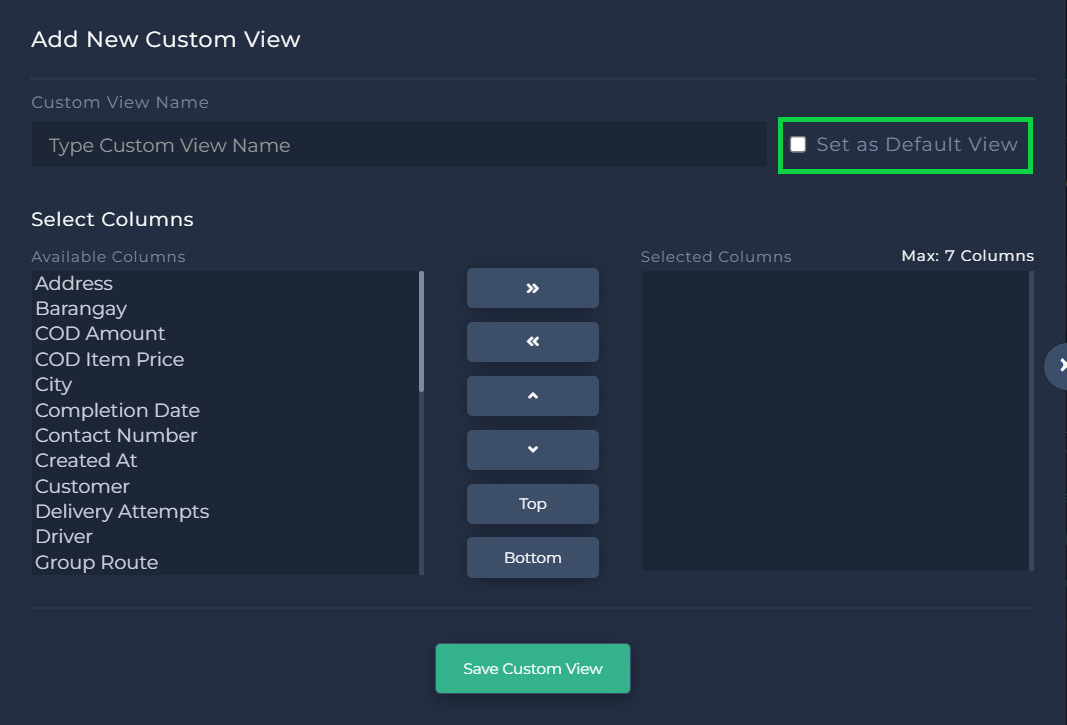
3. Enter the Custom View Name.

Note: User can click the Set as Default View box to make the Custom View as Default View once they logged in.
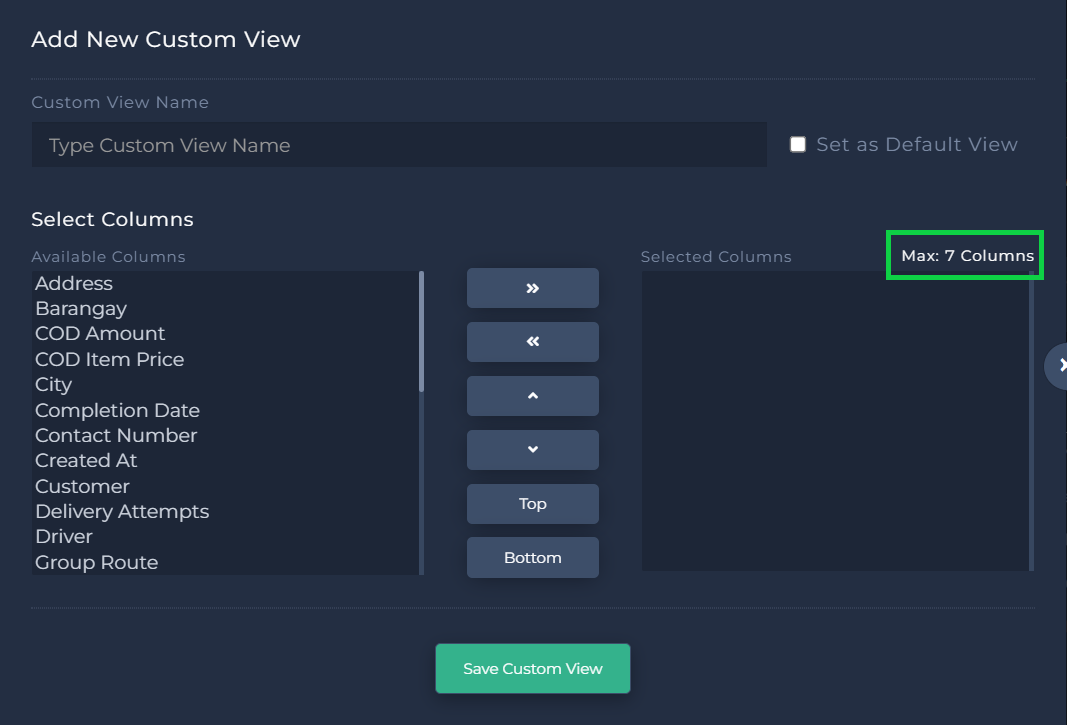
4. Choose and select the columns to be included in the Custom View (Available Columns & Selected Columns).
Note: A Custom View can have a Maximum of 7 columns ONLY.
Note: Use the following action buttons to transfer your preferred columns (Available Columns) to your Custom View (Selected Columns).
a. Left Arrow - Transfers a column (Available Columns) to the Custom View (Selected Columns).
b. Right Arrow - Transfers a column (Selected Columns) back to Available Columns.
c. Up Arrow - Moves the column (Selected Columns) one place up.
d. Down Arrow - Moves the column (Selected Columns) one place down.
e. Top Button - Places the column (Selected Columns) at the top of the list.
f. Bottom Button - Places the column (Selected Columns) at the bottom of the list.
5. Click Save Custom View.
Update Custom View
To Edit an Existing Custom View:
1. In the Custom View filter, click the Pencil icon.
2. Make the necessary changes.
3. Click Save Custom View.
Remove Custom View
To Delete an Existing Custom View:
1. In the Custom View filter, click the Trash icon.
2. Click Delete.
Related Articles
How do I create a custom view that displays my created group routes?
Custom View: Group Routes This module is a guide on making a custom view that displays the Group Route Names and Job Sequence so that the User can monitor a Group Route in their Pending Jobs page. Add a Group Route: Custom View To Create a Custom ...What are the job statuses in my Fleet Web account?
Job Post Statuses This module is a guide to know the different job statuses in Fleet PH Web with their corresponding color schemes. Common Job Statuses For statuses that are common in Fleet PH Web: "For Return" Job Statuses For jobs that are to be ...What can I see in my Fleet web account page upon logging in?
Homepage View: List View This module is a guide for the List View or the Default view upon logging in to a Fleet Web account. Users can also view job posts or view the job post's details. Sample view of job posts in List View Different action buttons ...How do I easily view my jobs in a month?
Homepage View: Calendar View This module is a guide for when Fleet Web Users would want to easily view their Overdue/Pending Jobs for the month. Adding Regular or Advance Jobs can also be done here. Access Calendar View To go to the Calendar View: 1. ...Is there a way that I can also add jobs in the Fleet Ph Mobile App?
Creating a Job Post Just like the Fleet Ph Web App, you could also Create a Job under your Settings menu. 1. Make sure that the Receive Job Toggle is On (Assigned Tab). 2. Click the Hamburger icon to view your Settings menu. 3. Click ...